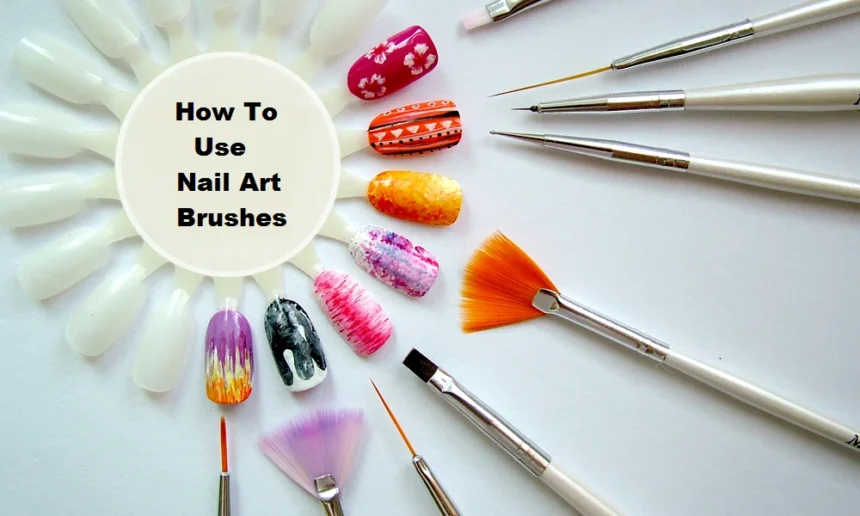
Ready to turn your nails into tiny masterpieces? Whether you’re a beginner looking to try your first design or a seasoned pro, having the right nail art instruments is the secret to success. Think of them as your paintbrushes and chisels for creating stunning nail designs. From simple dots to intricate patterns, the tools you use make all the difference. This guide will walk you through everything you need to know about building your essential toolkit, helping you unleash your inner artist and achieve salon-quality results right at home. Let’s dive into the colorful world of nail art and explore the instruments that will bring your creative visions to life.
Key Takeaways
- Foundation First: Essential tools like dotting tools, striping brushes, and cleanup brushes form the backbone of any nail art kit.
- Detail is Key: For more intricate work, specialized nail art instruments such as fine liner brushes, fan brushes, and marbling tools are indispensable.
- Beyond the Brush: Items like nail stamping kits, decals, and rhinestones offer easy ways to add complex and professional-looking designs without freehand drawing.
- Proper Care is Crucial: Cleaning and storing your instruments correctly will extend their lifespan and ensure they perform well for every manicure.
- Practice Makes Perfect: Don’t be afraid to experiment! The more you use your tools, the more comfortable and creative you’ll become.
The Essential Nail Art Instruments for Beginners
Starting a new hobby can feel overwhelming, especially when you see the vast array of tools available. But you don’t need to buy everything at once. A few basic nail art instruments can get you started on your journey. These foundational tools are versatile, easy to use, and perfect for mastering fundamental techniques before moving on to more advanced designs. Building your collection starts with these must-have items that will serve you well for countless manicures.
Dotting Tools: The Gateway to Simple Designs
If you buy only one set of nail art instruments, make it a set of dotting tools. These are typically dual-ended wands with small metal balls of various sizes on each end. They are incredibly versatile and user-friendly. You can use them to create perfect polka dots, simple flowers, animal prints, and even delicate swirls. To use them, simply dip the ball end into your nail polish and gently press it onto your nail. The size of the dot depends on the size of the tool’s tip and the amount of pressure you apply. They are a fantastic starting point for anyone new to nail art because they offer a lot of creative potential with a very gentle learning curve.
Striping Brushes: For Lines and More
Next up are striping brushes. These are characterized by their long, thin bristles, designed for painting straight, crisp lines. Whether you’re creating classic stripes, geometric patterns, or color-blocking designs, a good striping brush is essential. You can also use it to outline shapes or fill in larger areas with precision. For those just starting, it’s often easier to use a dedicated striping brush rather than the brush that comes with a bottle of striping polish. Having a separate set of nail art instruments like these gives you more control and allows you to work with any color in your collection.
Cleanup Brushes: The Secret to a Flawless Finish
Even the steadiest hand can make a mistake. That’s where a cleanup brush comes in. This small, angled or flat brush is your best friend for achieving a professional, clean look around your cuticles. After you’ve finished your design, simply dip the brush in nail polish remover (acetone works best) and carefully trace around the edges of your nail. It instantly removes any stray polish, correcting smudges and creating a sharp, perfect manicure line. This simple step elevates your nail art from “homemade” to “salon-perfect.” It’s a non-negotiable tool for a polished and tidy result.
Leveling Up: Intermediate Nail Art Instruments
Once you’ve mastered the basics with dotting tools and striping brushes, you’ll likely want to tackle more complex and detailed designs. This is where intermediate nail art instruments come into play. These tools offer more precision and open up a whole new world of creative possibilities. They might require a bit more practice, but the stunning results are well worth the effort. Expanding your kit with these instruments will allow you to create the intricate designs you’ve been admiring online.
Fine Liner Brushes: For Intricate Details
A fine liner brush is similar to a striping brush but often shorter and even thinner, giving you ultimate control for detailed work. This is the tool you’ll reach for when you want to draw delicate swirls, tiny letters, intricate lace patterns, or detailed character art. The fine point allows you to place polish exactly where you want it, making it one of the most important nail art instruments for artists who love precision. Working with a liner brush requires a steady hand, so it’s helpful to rest your arm on a table to keep it stable while you paint.
Fan Brushes: For Gradients and Textures
A fan brush is a flat brush with bristles that fan out, as its name suggests. This unique shape makes it perfect for a variety of techniques. You can use it to create beautiful gradient effects by painting two or three colors onto the brush and sweeping it across the nail. It’s also great for creating abstract textures, wispy lines, or sprinkling glitter evenly over the nail. While it might seem like a niche tool, a fan brush can produce effects that are very difficult to achieve with other nail art instruments, making it a valuable addition to your growing collection.
Stamping Kits: Intricate Designs Made Easy
Nail stamping is a game-changer for anyone who wants detailed designs without the stress of freehand painting. A basic stamping kit includes a metal plate etched with designs, a scraper, and a silicone stamper. You apply polish to the etched plate, scrape off the excess, press the stamper onto the design to pick it up, and then roll the stamper onto your nail to transfer the image. The variety of available plates is endless, from geometric patterns to floral motifs. This technique allows for perfectly replicated, complex designs on every nail with minimal effort.
Advanced Tools for the Nail Art Enthusiast
For those who are truly passionate about nail art and want to push their creative boundaries, there are advanced nail art instruments that offer even more possibilities. These tools are often found in professional salons but are becoming increasingly accessible for at-home use. Incorporating them into your routine can help you achieve truly unique and show-stopping nail art that reflects your personal style.
Airbrush Kits for Nails
An airbrush kit provides a flawless, blended finish that is nearly impossible to replicate by hand. Using a small air compressor and a spray gun, you can create seamless gradients, stencil designs, and soft, ethereal backgrounds for your nail art. Airbrushing requires some practice to control the paint flow and pressure, but it’s an incredible tool for creating professional-grade ombré effects and detailed stenciling.
E-Files for Shaping and Prep
An electric nail file, or e-file, is a motorized tool used for shaping, buffing, and cleaning up nails and cuticles. While often associated with acrylics and gels, it can be used carefully on natural nails for prep work. It ensures a perfectly smooth canvas for your art and can help in creating perfectly shaped nails. It’s a powerful tool, so it’s crucial to use it on a low setting and with the correct attachments to avoid damaging your natural nails.
Specialized Sculpture Brushes
For those who work with 3D nail art using acrylic or gel, specialized sculpture brushes are a must. These nail art instruments come in various shapes and sizes, like oval or pointed tips, designed to mold and shape the material into flowers, bows, and other three-dimensional embellishments. Mastering 3D art requires skill and patience, but having the right brushes makes the process much more manageable.
Essential Nail Art Instrument Comparison
To help you decide where to start, here is a quick comparison of some fundamental tools.
|
Instrument |
Primary Use |
Skill Level |
Why You Need It |
|---|---|---|---|
|
Dotting Tools |
Creating dots, flowers, simple patterns |
Beginner |
Extremely versatile and easy to master for basic designs. |
|
Striping Brush |
Painting straight lines, geometric shapes |
Beginner |
Essential for clean lines and structured patterns. |
|
Cleanup Brush |
Removing excess polish from cuticles |
Beginner |
Guarantees a professional, clean finish for any manicure. |
|
Fine Liner Brush |
Intricate details, letters, delicate swirls |
Intermediate |
Offers ultimate precision for detailed freehand artwork. |
|
Fan Brush |
Gradients, glitter application, textures |
Intermediate |
Creates unique effects that are hard to do with other tools. |
|
Nail Stamper |
Transferring pre-made designs to nails |
Beginner/Int. |
Perfect for complex, uniform designs without freehand skill. |
Maintaining Your Nail Art Instruments
Investing in quality nail art instruments is only half the battle; you also need to take care of them. Proper maintenance ensures your tools last longer and perform at their best every time you use them. Neglecting your tools can lead to stiff bristles, caked-on polish, and poor application.
To clean your brushes, dotting tools, and stampers, use pure acetone. Pour a small amount into a dappen dish or a small glass container. Gently swish your brushes in the acetone until all the polish dissolves, then carefully wipe them on a paper towel and reshape the bristles. For dotting tools, simply wipe them clean with an acetone-soaked cotton pad. Be sure to clean your tools immediately after use, as dried polish is much harder to remove. Store your brushes upright or in a protective case to keep the bristles from getting bent. For more great lifestyle and beauty tips, you can check out sites like TrendsMag.
Conclusion
Building a collection of nail art instruments is an exciting part of exploring your creativity. You don’t need every tool on the market to create beautiful designs. Start with the basics like dotting tools and brushes, and gradually add more specialized instruments as your skills and confidence grow. Remember that proper care of your tools is just as important as the techniques you use. With the right instruments and a bit of practice, you can transform your nails into a canvas for self-expression and enjoy stunning, professional-looking manicures without ever leaving your home.
Frequently Asked Questions (FAQ)
Q1: What are the absolute must-have nail art instruments for a complete beginner?
For a total beginner, the three most essential tools are a set of dotting tools, a thin striping brush, and a cleanup brush. These three items will allow you to create a wide variety of simple yet beautiful designs and ensure a clean, professional finish.
Q2: How do I clean my nail art brushes without damaging them?
The best way to clean your nail art instruments is with pure acetone. Dip the brush into the acetone, gently swirl it to dissolve the polish, and then wipe it on a lint-free cloth or paper towel. Immediately reshape the bristles while they are still damp and store them upright to dry. Avoid leaving them to soak for extended periods, as this can damage the glue holding the bristles.
Q3: Can I use regular craft brushes for nail art?
While you can use very fine-tipped craft brushes, they are often not designed to withstand acetone. Dedicated nail art instruments are made with acetone-resistant materials, so they won’t fall apart after cleaning. It’s generally better to invest in brushes specifically made for nail art.
Q4: What is the easiest way to create a complex design if I can’t draw?
If freehand drawing isn’t your strong suit, nail stamping kits are your best option. They allow you to transfer intricate, pre-made designs onto your nails perfectly every time. Nail decals and stickers are another fantastic, no-skill-required option for adding detailed images to your manicure.
Q5: How do I get my nail art to last longer?
The key to long-lasting nail art is proper preparation and sealing. Start with a clean, buffed nail surface and apply a quality base coat. After your design is completely dry, apply a durable, high-shine top coat. Be sure to “cap” the free edge of your nail with the top coat to prevent chipping.